✨ Childhood vs Present AI Photo Edit – How to Create Viral Cinematic Portraits (Step-by-Step Guide)
A new trend is taking over Instagram, Facebook, and YouTube 🚀 —
the “Childhood vs Present Cinematic Portrait” edit.
This style combines:
- 👶 Your childhood photo
- 🧑 Your current photo
- 🎂 A birthday cake with age (like 30)
- 🕯️ Soft cinematic lighting
- ❤️ Emotional storytelling vibe
The result? A beautiful, viral-worthy memory post that instantly grabs attention.
🔥 Why This Trend Is Going Viral?
This edit is trending because it connects emotionally and visually:
- 💭 Shows your journey (past → present)
- 🎬 Looks like a movie scene
- 🤖 AI makes it hyper-realistic
- 🎉 Perfect for birthdays & milestones
👉 People stop scrolling when they see this — that’s the power!
🤖 How to Create This AI Photo Edit
You don’t need advanced editing skills. AI tools can do most of the work!
📸 Step 1: Choose Your Photos
Pick:
- A clear childhood photo 👶
- A high-quality recent photo 🧑
✅ Tips:
- Face should be clearly visible
- Similar angles = better results
- Good lighting helps a lot
🛠️ Step 2: Use AI Tools
Here are the best tools you can try:
- Remini AI – Enhance face quality
- FaceApp – Face adjustments
- Midjourney – Cinematic AI images
- Leonardo AI – Creative edits
- Canva – Final design & text
- Adobe Photoshop – Advanced editing

Use the Prompt
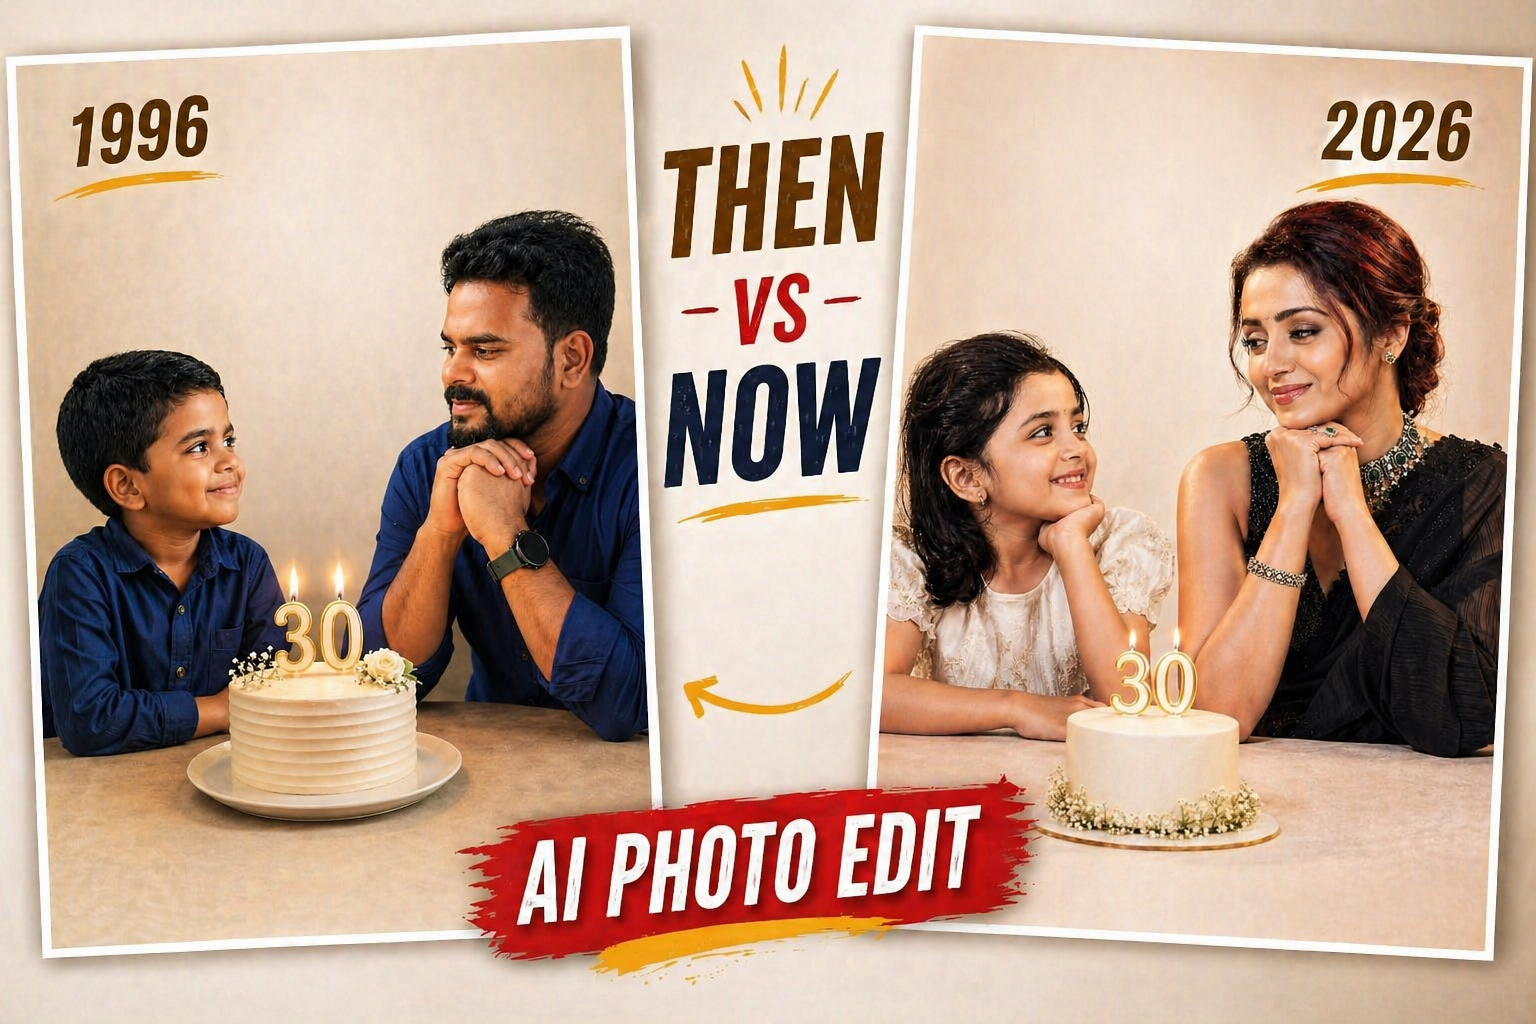
Create a highly realistic, emotional, cinematic studio portrait in full color (not black and white) 4:6
Scene composition: On the left: a child version of me (from a childhood photo), smiling innocently and looking towards the right. Add the text “1996” above her in a subtle, elegant font.
On the right: a present version of me (from a recent photo), sitting with her hands gently placed under her chin, looking at the child with a calm, emotional smile. Add the text “2026” above her in a matching style.
In the center: a minimal, elegant birthday cake placed on a table, with a “30” candle on top, softly glowing.
Background: Soft, clean studio
👉 A good prompt = better results 💯
🎭 Step 4: Maintain Face Consistency
This is very important 👇
- Upload your real images as reference
- Use “face reference” or “image prompt” option
- Keep facial identity consistent
👉 Otherwise, AI might change your face completely.
🎨 Step 5: Final Touch (Make It Perfect)
After AI generates the image:
- 🎨 Adjust colors & tones
- ✨ Smooth skin & lighting
- 🖋️ Add text (1996 / 2026)
- 🌫️ Add soft background blur
👉 Use Canva or Photoshop for finishing touches.
⚫ Black & White vs 🌈 Color – Which Is Better?
| Style | Best For |
|---|---|
| ⚫ Black & White | Emotional, classic feel |
| 🌈 Color | Modern, realistic, viral |
👉 For social media, color version performs better 📈
📱 Social Media Posting Tips (Go Viral 🚀)
✍️ Caption Ideas:
- “From 1996 to 2026 ❤️”
- “Time changes, memories stay ✨”
- “Then vs Now 🔥”
🔖 Hashtags:
#AIPhotoEdit #ThenVsNow #ChildhoodMemories
#CinematicPortrait #AIArt #PhotoTransformation
#TrendingReels #BirthdayPost
⚡ Pro Tips for Best Results
- 🔥 Use high-resolution images
- 💡 Keep lighting similar in both photos
- 🎯 Focus on facial expressions
- 📏 Use 4:6 ratio for best framing
- 🎬 Add cinematic lighting for premium look
🎯 Final Thoughts
This AI trend is more than just editing —
it’s about telling your life story in one frame ❤️
With the right tools and prompt, you can easily create
a professional, emotional, viral photo in minutes.